You might also like
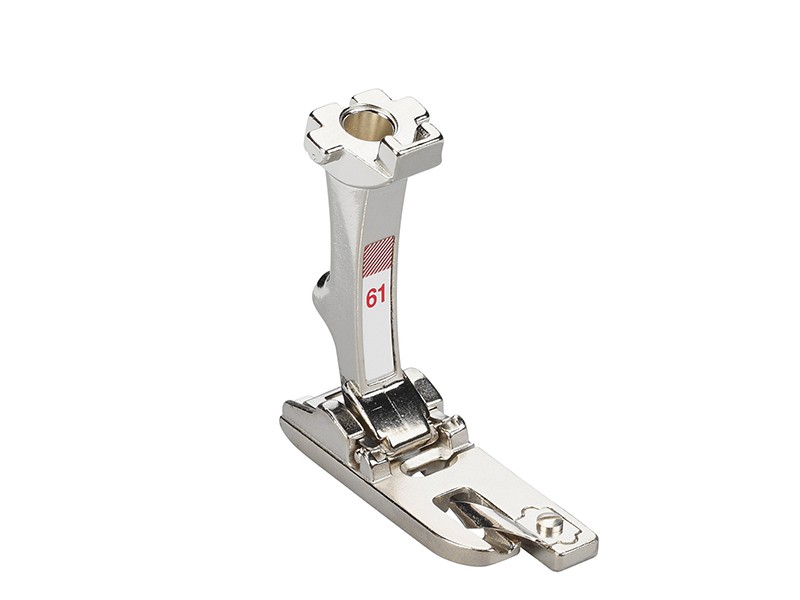
Foot For Husqvarna hidden zippers
72,36 zł Netto
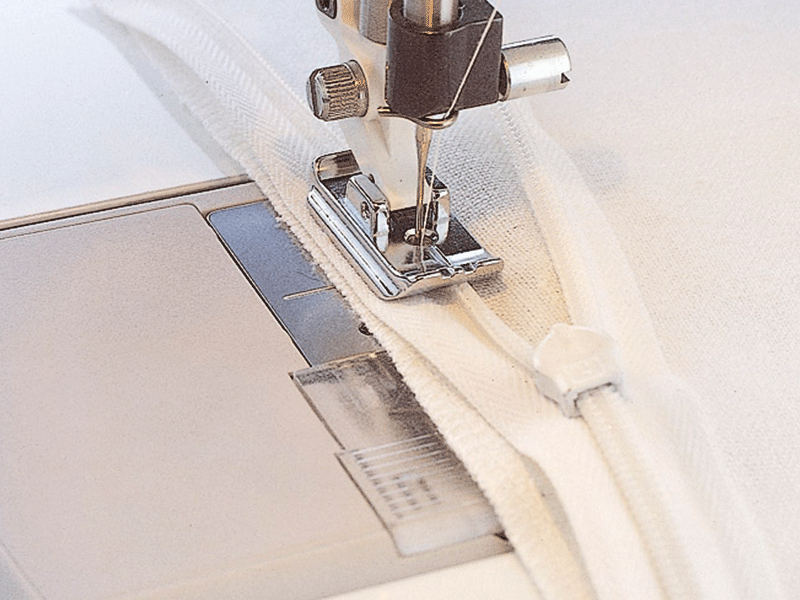
The hidden zipper is sewn into the garment before its elements are finally connected. The foot has 2 grooves on the bottom in which the zipper teeth slide and hold them while sewing.
For machine series: Husqvarna 1,2,3,4,5,6,7,8
catalog number 412687045
For Husqvarna series 1,2,3,4,5,6,7,8 machines
The hidden zipper is sewn into the garment before its elements are finally connected. The foot has 2 grooves on the bottom in which the zipper teeth slide and hold them while sewing. The zipper should be at least 3 cm longer than the expected extension length.
1. Mark the correct zipper length on the fabric and on the zipper. The excess length should be at the bottom of the zipper.
2. Attach the hidden zipper foot. Select a straight stitch with a central needle position, stitch length 2.5-3.0.
3. Open the zipper.
4. Fold the right side of the zipper with the fabric, right sides together. The zipper teeth should be on the seam line, and the upper zipper tip should be approx. 2 cm below the edge of the fabric /fig. A/.
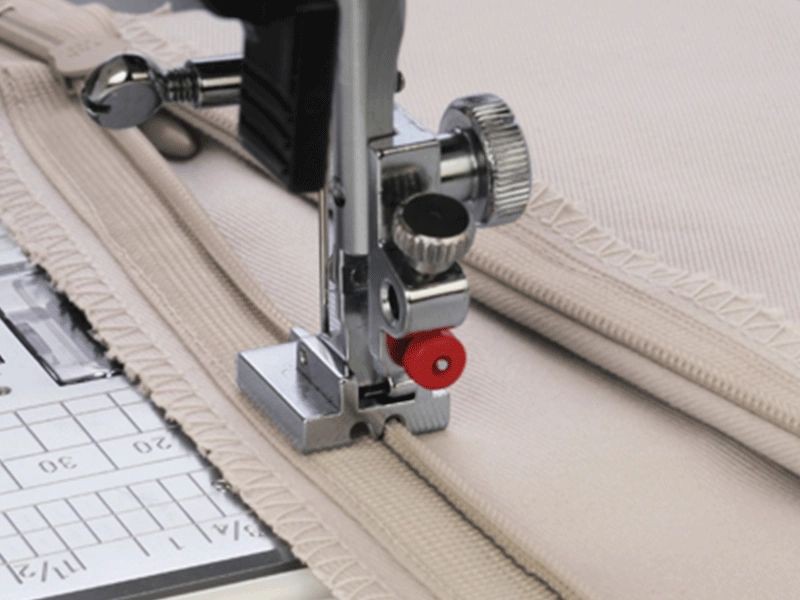
5. Raise the zipper teeth, lower the foot so that the teeth are in the right groove on the bottom of the foot. /fig.B/.
6. Adjust the needle position so that it is aligned with the needle guide on the front of the presser foot. Sew a few stitches backwards to secure the thread end and sew. Finish sewing at the zipper length mark and sew a few stitches back to secure the end of the thread /fig.C/.
7. Place the left side of the zipper with the left side of the fabric, right sides together. Lower the foot so that the zipper teeth are in the left groove of the foot. Check that the needle inserts evenly with the needle guide on the front of the foot. Sew the same way as the previous side of the zipper.
8. Close the zipper. Place the zipper and fabric right sides together. Attach the standard zipper foot E to the left of the needle. Set the needle to the right position. Pin the remaining fabric below the zipper with right sides together. Make a seam from the bottom to the top of the zipper, fasten the end of the thread with reverse stitches / fig. D/.
9.If the zipper is too long, sew across the zipper teeth, 3 cm below the sewn-in length of the zipper. Trim off the excess zipper below the seam.
We invite you to purchase needles for sewing various materials, additional bobbins and presser feet. You will find everything in the "Accessories" category
Description of the above product is protected by copyright. Their use requires the permission of the copyright owner. Downloading the content of the above description without the consent of Wiking Polska Sp. z o.o. based in Krakow constitutes an act of unfair competition in the light of the ACT of April 16, 1993 "on combating unfair competition".
8 other products in the same category:
Product Review
-
Reviews (0)
-
Latest







@CUSTOMER_NAME@
@AUTHOR_PROFILE@ @COMMENT_ISO_COUNTRY@@COMMENT_TITLE@
@COMMENT_COMMENT@